Archive for the ‘Digital Painting’ Category

CtrlPaint.com best instruction for digital painting in Photoshop

August 10, 2015

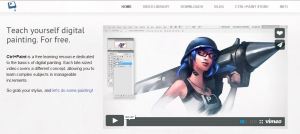
Are you new to learning digital painting? OR do you have some experience painting but want to expand your knowledge on digital painting and apply it to other avenues of art and design; especially for art and entertainment. Such as concept art, character design, vehicle design, Illustration, and other fundamentals of art and design? If so I recommend http://www.cntrlpaint.com

Ctrlpaint was created by Matt Kohr who has worked as a professional industry concept artist for many popular movies and games. He decided to share his experience and help direct enthusiastic artists’ with solid fundamentals for painting as well as solid skills in using the Photoshop platform.

The ctrlpaint site has a ton of free videos under the video library section. They are usually about 5 minute videos with clear organized instruction from Matt Kohr. Besides the free videos you can purchase the premium videos ranging roughly an hour long for an average price of about $10. I would recommend ctrlpaint for painting in Photoshop first before you invest elsewhere. If you get a chance to check out the site feel free to leave comments here about your experience.

Thanks,

ctrl paint digital painting

ctrl paint digital painting

Ctrl Paint Library

Visit at the link below

http://www.ctrlpaint.com/

Vase Still Life painting in Photoshop cs4

May 21, 2013

1 2 3 4 5 6 7 8 9 10 11 12 13 clean 13 14 15 16 17 Still Life VaseFinal

I’ve expanded my digital painting methods by taking the time to learn Photoshop efficiently along with Corel Painter. I love working in both of the programs; each has  its advantages.

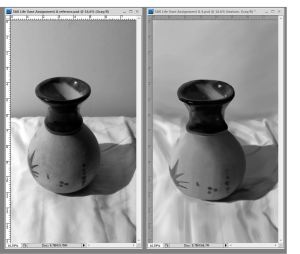
For this painting I set up the still life( props, lighting and photography). The light source was a single desk lamp, used  to create dramatic light and shadows of the vase’s form. The sheet underneath was set up with wrinkles to lead the eye to the vase; to give the still life a good composition and to help guide the viewers eyes around the vase.

I set it up around 300 dpi, for the brushes I used Photoshop’s round hard brush, round soft brush, large flat brush for the background and manipulated the blender brush to soften the shadows. I used the brushes at 1oo% opacity and the brush flow between 20-50%.

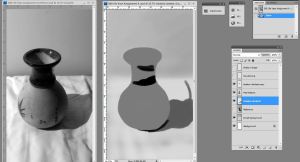
Take a look at the start to beginning process.

I started out drawing an outline of the base to the best of my ability; without using any of Photoshop’s tools(ellipse tool, pen tool etc.).  The next steps I painted were the large shapes. From their I found the middle tone, shadow shapes and details along with shadow shapes last. Once I worked out the painting enough I went back to make the last adjustments. I used Photoshop’s tools to make the last few adjustment; starting with the elliptical tool to get the top of the vase’s shape correct, followed by proportions, etc.